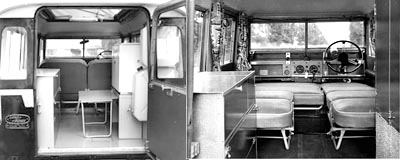
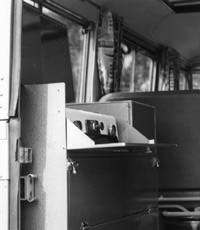
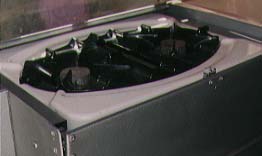
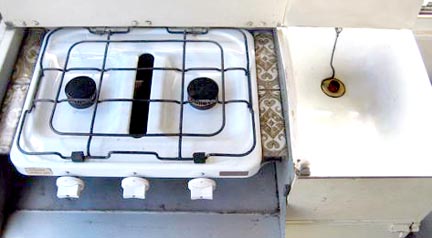
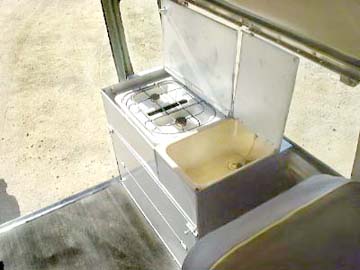
The standard Land Rover kitchen unit is a steel cabinet
that contains a two burner cooker with broiler and a sink. A
top front door opens downward to expose the burner controls and
the broiler area. This picture shows the top door lowered
for access to the burner knobs and the broiler space. Just
below that can be seen the door for the lower storage space. It
is held in place by 2 top latches and hinged at the bottom.
The kitchen unit is painted Hammerite silver
and has hinged aluminium lids covering the top of the unit.
|
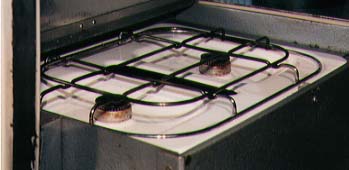
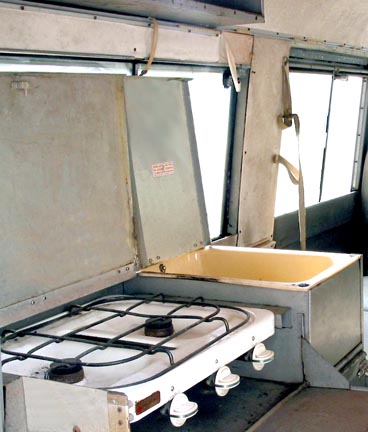
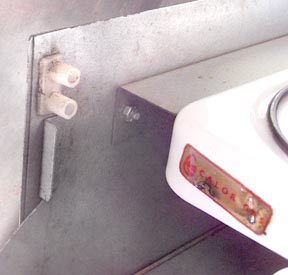
Stove controls are a very early type |
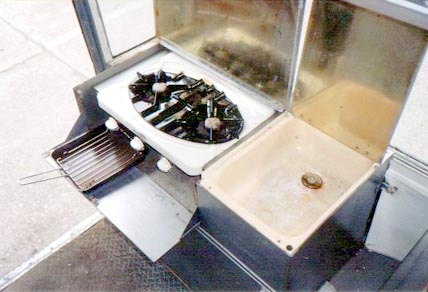
The pictures above and below shows a cooker unit with both top
lids open and the top front door open. The sink is a pale salmon
(pinkish) coloured perspex plastic. Shown is an early 1960's
Calor propane stove and a broiler pan. The dual lids allow the
stove top to be used as a counter when washing dishes or the sink
top to be used as a counter whilst cooking. Note that the
stove unit and broiler pan are off the shelf purchased units and
as such change over time as the manufacturer revises their products
and as different broiler pans are sourced.

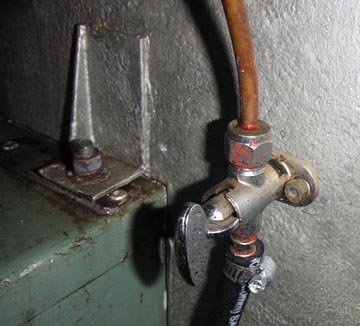
There is a gas shut off valve located
inside the cabinet on the right side. The Dormobile
operational manual instructs owners to keep this valve
in the off position except while cooking. The manual also instructs
owners to verify that this gas valve is in the off position
prior to turning in the the night.
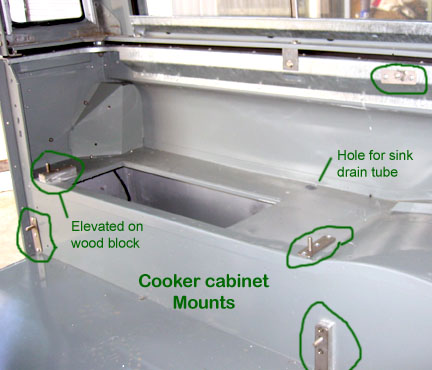
Also in this picture you can see one of the mounting points
for the cooker cabinet. |
 |
Martin Walter used the Calor brand propane stove,
manufactured by Stoves Ltd. as their standard unit. The
design of the Calor stove changed over time and is reflected in
differences found in different year Dormobiles.
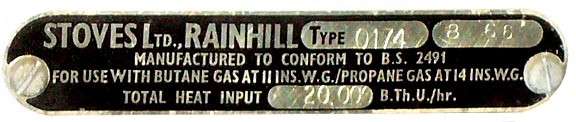
The manufacture plate is attached at the
rear of the stove. The date of manufacture stamp, top right, shows
this stove was manufactured in August 1966
The Calor stove this plate is attached to is type
0174 and produces 20,000 BTU/hr with both burners and broiler turned
on high. That's in the range of small heater units an can
quickly heat up the interior of a closed up Land Rover Dormobile. Please
just don't fall asleep with the stove lit.
 |
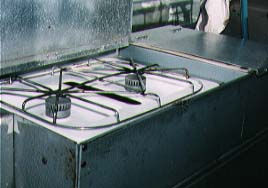
This Calor cooker unit came
on a 1962 Land Rover Dormobile. The grill is made
of two cast iron units.
The top door is in the up position protecting the controls
from being accidentally turned on. |
This stove has the first version
of the steel rod grill. The grill was used in the mid
1960's . Early versions appear to be black oxide finished
and later versions seem to be either chrome plated or stainless
steel.
The slot in the centre of the cooker is a vent above the
centre of the broiler. |
|
|
This stainless steel grill is usually associated with late
sixties and early 70's Dormobiles. This stove uses
new taller burners than previous versions.
Notice the aluminium lids in this picture. They provide
a drain board surface for cooking or washing dishes depending
which side is down and protects the unit whilst traveling.
|
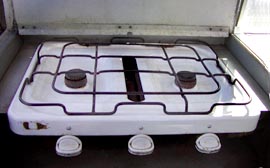
This is a mid
sixties stove with a late Series III grille. This grille
is identical to one found on a 1972 and 1974 Land Rover Dormobile
Here's some helpful measurements from Mic in case your cooker support brackets are missing:
"The brackets are formed out of 20 gauge steel into a channel with uneven legs. The channel is fitted with the legs down. The leg bolted to the cooker unit measures 1 1/2" (38mm), the web measures 1 13/16" (46mm) and the leg bolted to the cooker measures 5/8" (22mm). There are three bolts through the Cooker unit and two bolts through the cooker. The length of the bracket in 12" (300mm)"
|
|
Below is a cooker unit in a 1974 Land Rover Dormobile. Note
that the cooker knob style has changed and the front of the cooker
now has two labels. Also the sink was made of white plastic and not
salmon coloured plastic.
1974 Land Rover Dormobile cooker
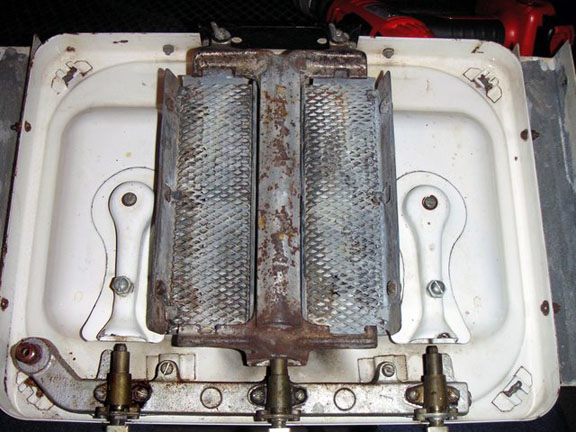
Underside of a stove showing the broiler, gas manifold and the 3 gas knobs
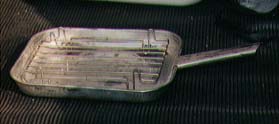
Thin sliced meats work best because of clearance. Meats
cook quickly in the broiler. With a little practice you
can broil some delicious foods. |
This is one of the ever elusive broiler pans that often
gets lost out of Dormobiles. The details of the pan construction
changed over the years but to the best of my knowledge they
all were a rectangular shallow pan with a handle at one end
and a grill insert. There is no one correct design.
If you are missing an original broiler pan, any
broiler pan will do that provides a cooking surface about
one inch above the broiler compartment floor. Toaster oven broiler pans are usually the correct size.
|
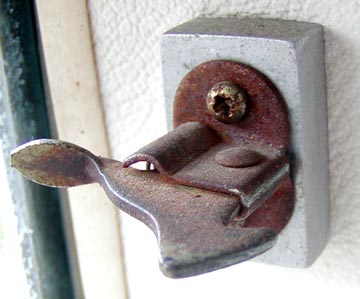
A wall mounted latch holds the cooker lid in the upright
position. Without it the lid over your stove could
slam shut while you are trying to cook. |
 |
Kitchen cabinet with all front doors closed. The stove is the late
1960's style
The standard Land Rover Dormobile sink is light pastel
pink Perspex plastic. It drains through a plastic tube at
the bottom of the sink. The plastic tube goes through a hole
in the floor and does not have a holding tank.
 |
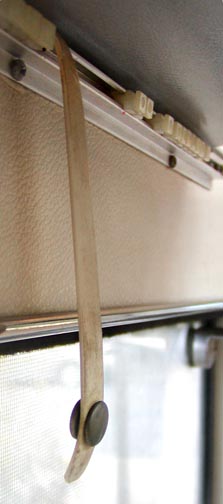
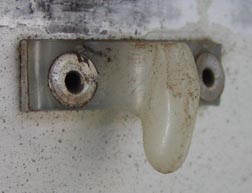
Left: The sink is secured to the cabinet with four sheet
metal screws. An over tight mounting screw is often
where a sink cracks.
There is a rubber bumper at each of the two front corners
of the sink for the lid to rest on. |
Right: This is the snap located
at the centre front flap of the lid covering the sink. The
other half of the snap is located on a short strip on the
wall.
The snap is to keep the sink lid raised. In real
life it stays up very well without the snap. |
 |
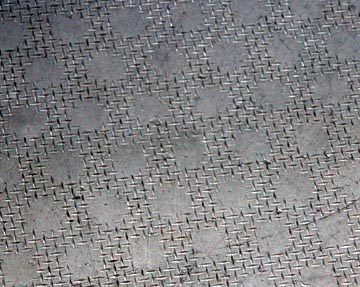
Right: This
is a side lit picture of a section of the aluminium cooker
lid showing the pattern stamped into the cooker cabinet lids.
There are separate lids for the cooker and sink that are
hinged to a stationary back section made from the same
material. The lid over the cooker uses three hinges,
the lid over the sink uses two. These hinges are the
standard chromed hinges used in the lower front door and the
wardrobe. |
 |
 |
This is a cooker unit in
a 1966 Land Rover Dormobile that retains two items that are
usually missing:
The sink lid still retains the original decal on the underside. These
usually do not survive many cleanings.
Also if you look at the top of the sink lid you will see the
retaining strap. The straps is fixed to the body at the
underside of the spice cabinet and snaps to the lid snap to
keep the lid from falling down during use.
The stove also retains its Calor decal as well. |
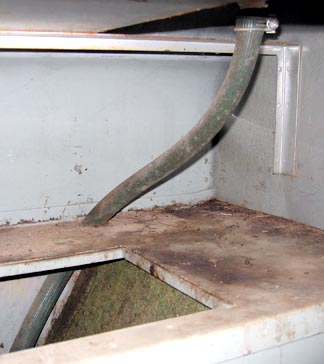
This picture show the routing
of the sink drain hose. The hole on the bench adjacent to the
wall secures the hose out of the way. There is a second
hole in the floor where the hose exits the vehicle. There
is no catch tank. It empties gray water on the ground.
Note: that the bottom hole can become a
source of dust and water intrusion into your lower
storage area. I have found that it helps to calk around the
hole. My Land
Rover doesn't have a water tight seal between the toolbox
floor and the body side so calking that edge helped keep
storage item clean and dry as well. |
 |
Accessory shelf (AKA spice rack)
Like the rest of the standard cabinetry the accessory
shelf is constructed of steel and painted with silver hammerite
paint. Initially this was an open lipped shelf but by Series
III production it came with a door that is bottom hinged.
Cooker latches and knobs
The top door of the cooker (broiler door) is
locked into the upright closed position by a Nylon latch that is
caught by a two prong catch.
Nylon latch pop riveted to top left side
of the cooker's top door (broiler door). This
one is well worn and painted over. |
Catch for nylon door latches |
 |
The broiler door nylon latch and catch came from the factory
unpainted.
The Calor cookers came with a red lettered gold coloured
label attached to the front left side. |
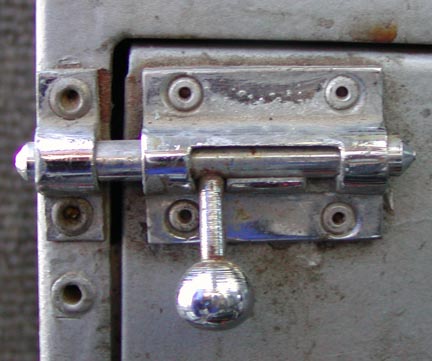
Cooker lid latch |
The catch consists of two sheet metal screws that
go though the sheet metal, through a thin threaded metal
plate and stick out on either side of the latches' closed
position. A short section of nylon tubing is threaded onto
each screw, providing the actual contact point for the nylon
latch.
Left is the nylon latch that is pop riveted
onto the cooker's top cover. It uses the same catch
arrangement as the broiler door. |
Right: Here is the black plastic knob that fits at the top
centre of the broiler door.
Just above the knob you can see the heads of the two screws
that are part of the catch for the lid latch. |
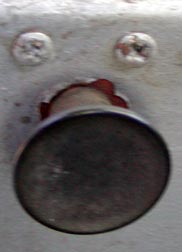 Broiler door knob
 |

This chrome plated hinge design was used
on both the cooker's front doors and lids as well as the wardrobe cabinet
door
This chrome plated latch assembly was used on the cooker lower
door and the wardrobe cabinet door. One latch was located at
each side of the lower cooker door, one at the top and one at
the bottom of the wardrobe cabinet.
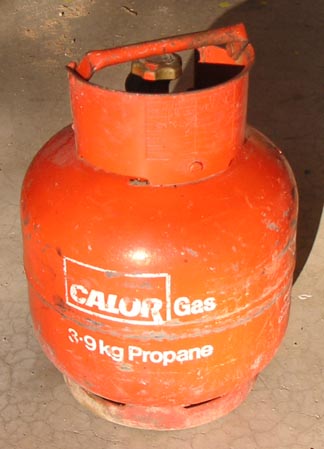
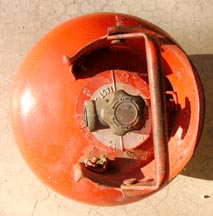
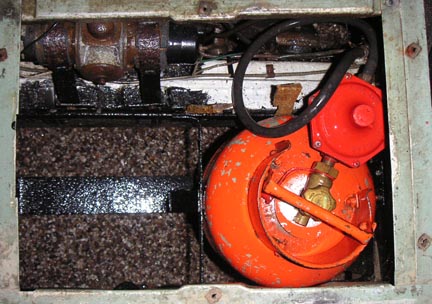
Propane
The Land Rover Dormobile cooker and optional propane
refrigerator receives propane from a pair of 2 gallon propane
tanks. The tanks are mounted in a basket that is suspended
from the underside of the seat box on the right side. A
pressure regulator connects directly to the valve of the active gas
tank.
Butane is a popular gas in Europe and propane is
the standard for North America. The regulators are different
for the different types of gas. So if your Dormobile is imported
from a country that commonly uses a different type of gas and your
stove is not working correctly you may have the wrong pressure
regulator. Replace it with a new one of the proper type and
see if that fixes your problem. Before you do though, be
sure to check the diaphragm air hole to make sure it is not clogged. A
pressure regulator uses a big diaphragm, one side of which needs
to be at ambient atmospheric pressure. There is a tiny
hole on that side. If that hole is plugged then the regulator
will not work at different altitudes. A small thing always
worth checking before buying a new pressure regulator.
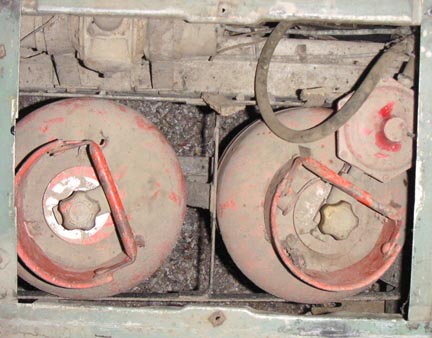
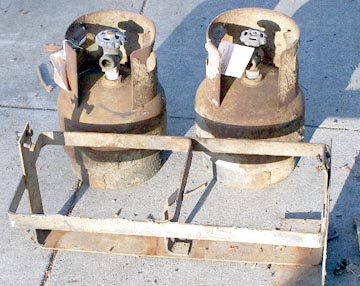
Here you can see the two propane tanks. When
one tank runs out the propane pressure regulator needs to be moved
to the other tank. Note
these tanks have a hinged handle to make it easy to lift the tanks
out of the cradle for refilling.
With one tank removed you can see the basket
that fits into the right seat box. It has a centre divider
to keep the tanks in place. Top left you can see the SU electric
fuel pump on this 6 cylinder NADA Land Rover Dormobile. The
propane pressure regulator is secured to the tank.