|

By Lonn Howard (Click on any picture for a larger view) The following is NOT a "How-To"! If you want to undertake a project of this magnitude you need the skills of a fabricator and the experience of someone whom has done it successfully. Or be a masochist.
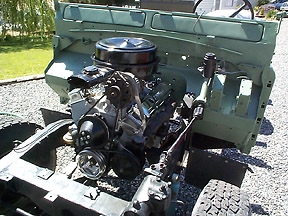
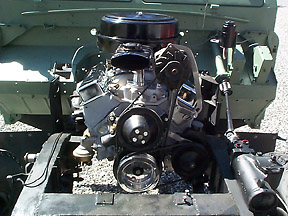
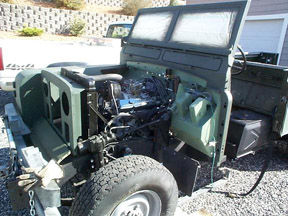
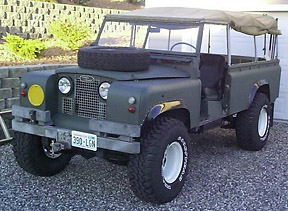
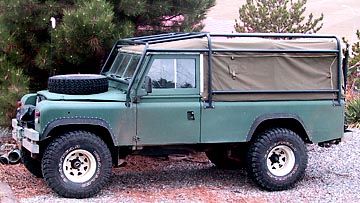
My '67 109 began life as a 2.25L petrol MOD FFR rig assigned to service in some unknown LHD country. When I acquired it in October of '99 it ran beautifully, however, one trip over a mountain pass and I made the decision to convert it to V8 power at the earliest opportunity. My goal was to develop a truck that would cruise at 70 mph at about 2400 rpm while still providing about 80 to 100:1 crawl ratio for serious rock crawling. I cut my teeth on Chevrolet engines so it was a given that a Chevy power plant would call the Rover home.
The decision as to which transmission to use was not an easy one. I first leaned towards the SM420 and SM465 transmissions. They are both venerable and bulletproof old transmissions with a super-low first gear in the SM420, and an improved gear spacing in the SM465. A bonus to the SMs was that they would both bolt directly to a Chevy bell housing and use all Chevy components. The downside was that I would have to retain the Fairey overdrive and my Series t-case to achieve the road-speed/rpm ratio I wanted. While the Series t-case is strong enough to handle the V8 the Fairey was not. My Fairey was in good shape and I had no desire to grenade it by hitting it with way more power than it was designed to handle. A new Santana at the time was $1400, so that was out of the question. Enter the NV4500 transmission. I chose the Dodge version which has a full synchro complement and an overdrive in a hell-for-stout package. If you are considering this transmission, be aware that you have to use the petrol version. The diesel version uses a different input shaft and will not mate to a Chevy without extensive modification. There are two Chevy versions as well that will work. The earlier version has a very low first gear, but has a weird gear spacing between 2nd and 3rd which was changed in the later version. The early version also has no synchro on first or reverse. The later Chevy version is similar to the Dodge. To use the Dodge or late Chevy NV4500 tranny you must find an early (pre'73) truck bell housing that has the large transmission locating hole. Use the cast iron version, as the aluminum version is bigger and clearance issues arise. The exact dimensions of the locating hole escape me now, but a quick jump to the Advanced Adapters site will enlighten you as to which bell housing will work with their adapter.
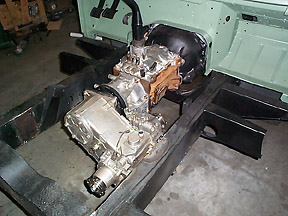
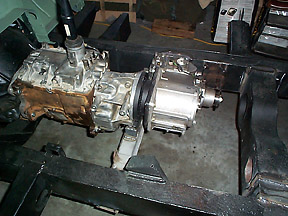
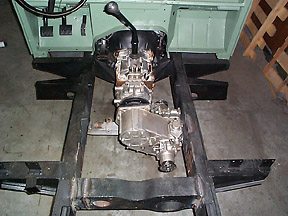
The adapter is about 7/8th inch thick and comes with a pilot bushing to fit the transmissions input shaft. This conversion uses a Ford throw out bearing and a Chevy clutch and pressure plate. You might have to grind down the ends of the clutch fork to fit the Ford throw out bearing, but it is only a few thousandths at most. Be forewarned, this transmission is HEAVY. It is about 200 lbs. dry, and it takes a gallon of very expensive ($100/gallon) proprietary synthetic transmission fluid. Since the NV4500 has a very capable overdrive I intended to use my stock t-case sans the Fairey overdrive. Unfortunately, my t-case had seen better days and would have had to be rebuilt. When a '96 full time LT230 t-case was made available it made more sense to convert it to part-time operation as it is beefier than the Series t-case. Had I used the Series t-case it would have been mated to the back of the NV4500 via a spud shaft. The tail housing of the NV4500 would have been machined to house a bearing for the spud shaft and new holes would have been drilled to match the six holes on the t-case flange. Relatively simple stuff. The decision to use the LT230 brought with it a whole new problem. The mating flanges didn't mate and the LT230 encroached on physical space the NV4500 already occupied! Fortunately, the space the LT230 wanted was unused inside the NV4500 so some judicious cutting and aluminum welding was done to alter the tail housing of the NV4500 to accommodate the LT230. Then an adapter had to be fabricated. The adapter is about 3 inches long and houses a bearing and a spud shaft. As you may surmise, this conversion is not feasible in an 88 due to the length of the whole enchilada.
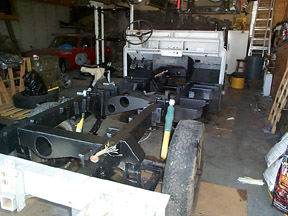
My front drive shaft is now 38.5 inches long and my rear drive shaft is now 30.5 inches short. To handle to V8 power a Salisbury rear end was installed which put the pinion 2 inches further forward and 1 1/2 inched lower, which exacerbated the short rear drive line problem. A pair of 4 degree camber compensators helped reduce the u-joint angles.
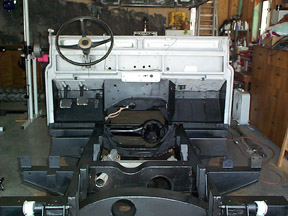
A few frame modifications were also required to make this whole thing work. The front cross member had to be moved forward and the breakfast mounting tabs had to be shortened. (TW note - Shortening & redrilling the radiator bulk housing mounting tabs allowed the radiator bulk housing to stay in it's stock location.) The radiator from a '64ish Chevy Impala will fit between the frame rails with judicious use of a BFH on the radiator, but radiator mounts had to be fabricated. The transmission mount had to be cut off and modified to support the NV4500, and the mid-cross member with the drive line pass-thru had to be sectioned and moved. As if that wasn't bad enough, there was sheet metal work involved as well. The bulkhead has to be modified to allow the bell housing to fit, and the transmission tunnel and seat box had to be modified to fit the monstrous NV4500 transmission.
This project is definitely not for the Land Rover purist, as there is no return from whence you came, but for the Land Rover lover whom would love more power, it's the only way to go.
|
|
If you would like to discuss any of the contents, or just say hi, please feel free to .
© 1997, 2001, 2017 TeriAnn Wakeman. All rights reserved. |