Detail
pictures of The Green Rover
Pre Dormobile
pictures | Dormobile
interior pictures
1998 and later External views
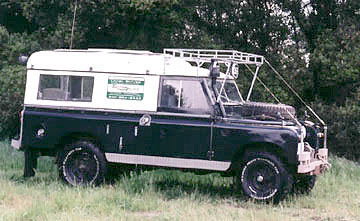
The Green Rover was converted to a Dormobile and repainted
(1971 Jaguar British Racing Green) during the Summer of 1997.
The first set of detail pictures were taken right
after the new roof rack and brush guards were installed during
the spring of 1998, before the 1998 Border to Border trip.
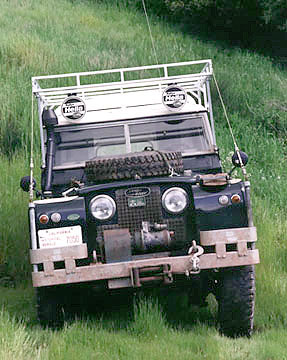
Front view 1998
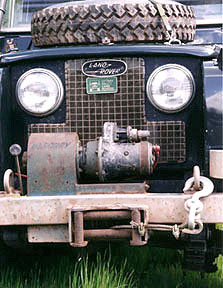
Here is the Mercury Winch fitted to The Green Rover. The
drum holds 120 feet of 3/8ths cable and have never stalled
on a single pull. Yes, that is a manual crank at the top
of the winch that accepts the Land Rover engine crank.
The hook is a Genuine Land Rover part.
The military overriders were added around 1995 along with
a new bumper and the Land Rover tow loops. I added the
1 inch water pipe in 1998 to serve as a brush guard and
front tie point for limb risers. Stronger than the
aluminum wing edges and very cheap to replace if they
ever get bent. At the top of the water pipe you can
see a Stainless steel spring at the base of the limb raiser
wire. The spring is there to absorb the shock of
a branch strike to the wire.
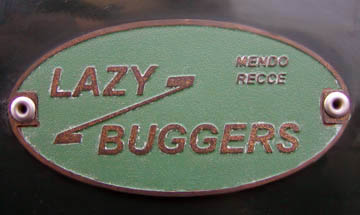
In the mid 1990's there was a group of people on the Mendo
e-mail list who trailed and camped together. We called
ourselves the Lazy Buggers. 2 Runs of brass badges
were made. This badge is from the first run.
The shovel and detachable handle pick axe used with Land
Rovers are usually referred to as "pioneer tools" They
were mounted on the tail gate of some military Land Rovers
and to the front wing tops of Camel Trophy Land Rovers.
There was a smaller set of tools mounted to the front of
101's as well. The shovel head is attached to the
handle at less of an angle than is found in regular digging
shovels. This is to allow the shovel to be used under
the vehicle in confined spaces to clear mud, snow or whatever
out from under a stuck Land Rover. Standard hardware
store shovels don't work anywhere as well in this application. I
got the shovel mounts from Mantec in 1996.
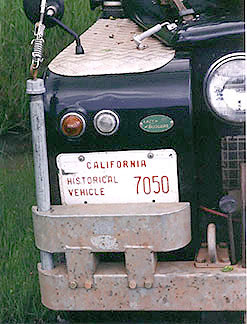
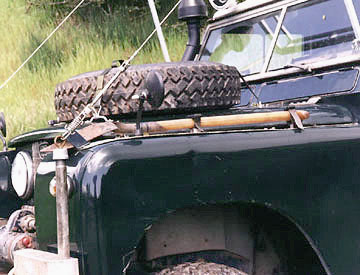
I decided to mount the detachable pick head on the bonnet
alongside the spare tyre instead of the wing top. This
was to give me a clear wing top to walk on. The bracket
holding the pick head came from a 101. Land Rover rivets
a rubber sheet to the body under each point of the mounted
pick head. I did the same. I
decided that a steel tipped pick handle would be too great
a temptation to would be vandals and store it inside the
vehicle.
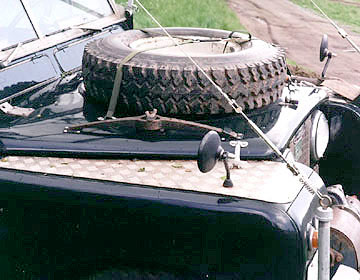
You should have noticed that I use military Land Rover bonnet
latches and a military Land Rover spare tyre mounting strap. The
reason for this is to eliminate flexing of the bonnet while
traveling on wash board surfaces. The stock civilian
bonnet is anchored at the rear hinges and a centre front
latch. The
front latch is spring loaded and holds the front of the bonnet
just a little above the edge of the radiator bulkhead. What
I was seeing was the bonnet flexing side to side around the
rear hinges. The civilian tyre mount anchors the tyre
at its centre. On washboard surfaces the heavy tyres rocked
back and fourth independently of the overall bonnet rocking.
all this producing a lot for flexing of the bonnet except
where the steel spare tyre mount and the steel bonnet hinge
are located. My feeling is that this was a recipe
for flex cracking of the aluminum along the edges of the
steel parts if I spent a lot of time driving washboard roads. The
military bonnet hold downs clamp the front of the bonnet
to the radiator bulkhead eliminating bonnet flex. The
military tyre mounting straps clamp the tyre to the bonnet
eliminating the spare tyre flexing of the bonnet.
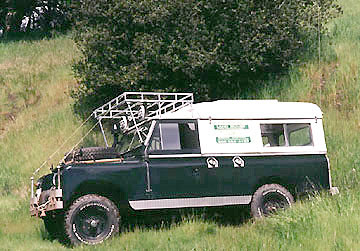
Left side view. Each side of the hard top is made of 2 88
sides joined together to make a single side. At the front
is a blank side 88 side with the back cut off. At
the rear is an 88 sliding window side with the front cut
off. I have a tall cabinet on each side of the vehicle
where the blank area covers and I wanted opening side glass
windows. You can see the joint seam in the picture below.
Notice there are two Land Rover front side fillers on the
left side. The front one is for the front left under
seat fuel tank. The rear one is for a 15 gallon stainless
steel water tank. The rear filer is modified with
the inside parts removed and replaced by plastic parts. My
fuel camps are locked for one key and the water cap is
locked for a different key so no one could accidentally
put fuel in the drinking water tank.
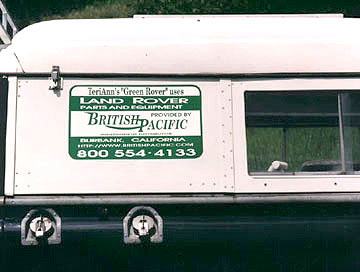
British Pacific sponsored my Land Rover in 1998 with
free parts and with fuel for a trip to the East coast and
back. After 1998 they have provided free tyres in return
for me displaying the decals.
The Mantec snorkel was purchased and added in 1996
as were the wing top tread plates and the aluminum diamond
plate along the side skirt. My side skirts have been bashed
and straightened repeatedly and looked like so much junk. I
bought the aluminum diamond plate to dress them up and add
a little strength.

The Mantec snorkel uses a 2-1/2 inch dia tube which just
doesn't flow enough for a 302 V8. When I converted
my V8 to EFI over the winter of 206-2007 I replaced the
filter system with a Donaldson horizontal canister filter
and a prefilter The prefilter is sitting on
the intake of the filter with a short extension. I
wanted a minimum of bends and I did not want to prefilter
or snorkel to partially block my view.
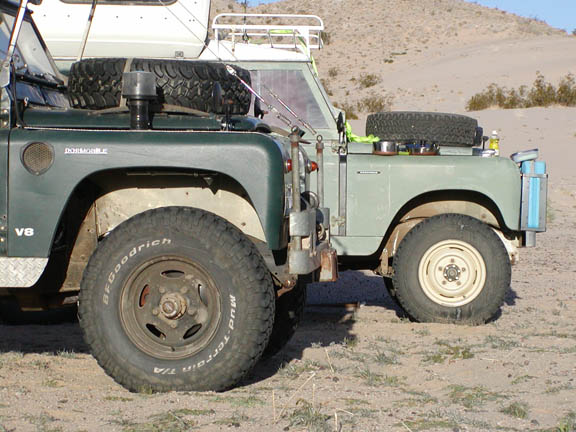
During the Winter of 2006-2007 I did a bunch of work on The
Green Rover that included converting the engine to EFI
and installing front disc brakes. I also replaced
some damaged front clip panels, The Green Rover received
a front left Series III inner wing panel and both wings
received 1984 Euro spec One-Ten outer wing panels. I
chose these panels to provide a larger wheel arch without
holes for side lights. The picture above shows the
new panels alongside a Dormobile with stock Series outer
wing panels and smaller tyres. Notice how much additional
space there is to fit my larger front tyres and for tyre
movement. At the top of the wheel arch you
can see the bottom edge of the Donaldson canister air filter
I installed as part of the EFI conversion. The prefilter
on the wing top sits directly above both the the filter
intake and the filter out passage which points into the
engine compartment in line with the EFI intake. There
is just enough space at the front of the filter to replace
the filter element. The unit is completely sealed except
for the base of the prefilter. It is a perfect fit
solution, but I felt that a taller 3 inch diameter snorkel
would restrict breathing, visibility and interfere with
the right scuttle vent without adding anything useful.
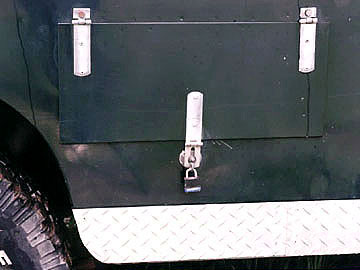
I have a 5 gallon horizontal propane tank mounted to the
top of the front right rear spring outrigger.
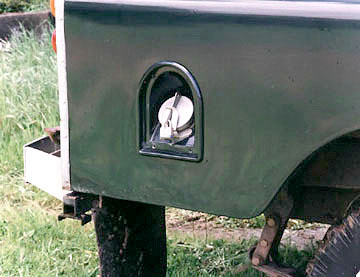
I cut a rectangular access door into the side panel and modified a 109 rear
tool ox lid as a side door. I cut the lip off the
lid and used the stock hinges and latch. The door
was added around 1993
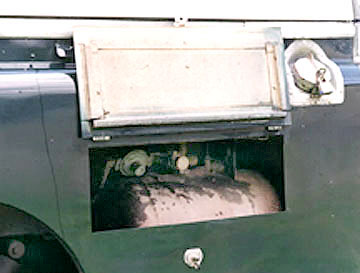
The propane is used by the Dormobile cooker. A fill usually
lasts 3-1/2 to 4 weeks.
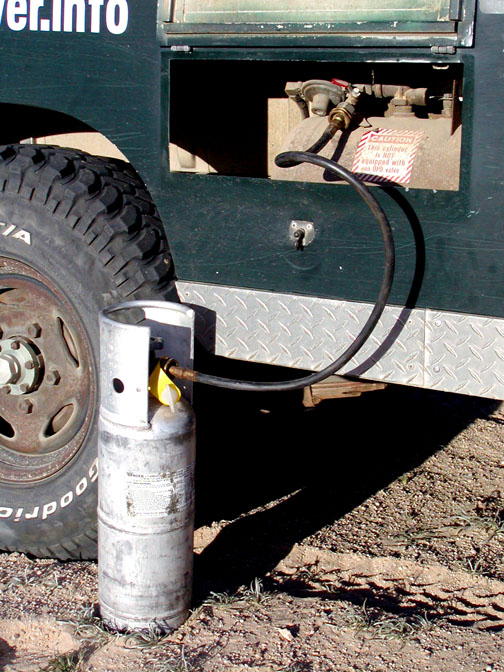
I carry an aluminum propane tank on the roof rack that I
can connect to my internal propane system if the main tank
runs dry while on a trip. The main tank is filled
from where the auxiliary tank hose connects to the built
in plumbing.
I added a rear fuel tank in 1996. The filler assembly is
from a Land Rover Defender high capacity pickup. Note that
the bottom sheet metal was cut off the body panel behind
the rear wheel. It i cut even with the body bottom
ahead of the rear wheel arch. The factory had the
panel extend down the the level of the bottom skirt. I
was always bending that part of the body off road so decided
to just eliminate it. At the back bottom corner of the
body you can see a mod I made to the rear cross member. Stock,
the cross member does not extend to the edge of the body,
leaving it unprotected from rock damage. I extended the
cross member out to the edge and added a jack point so
a high lift jack could be used at the rear corners. This
mod provided me with a mounting location for rear military
bumpers.
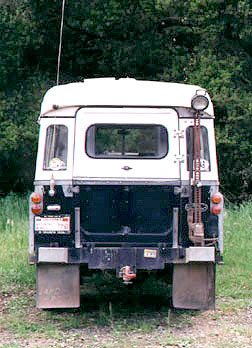
Here' rear view. Of note is the side hinged lift gate and
high lift jack mount. The right rear bumper saved
the right side of the body from damage the first time I
went on a trip after installing the bumpers. I backed
into an unseen steel post turning around in June
Lake, CA. About a year later a small Japanese car
impaled itself on the left rear bumper. My only
damage was a paint smear. He lost a radiator, grill,
headlamp and had body damage.
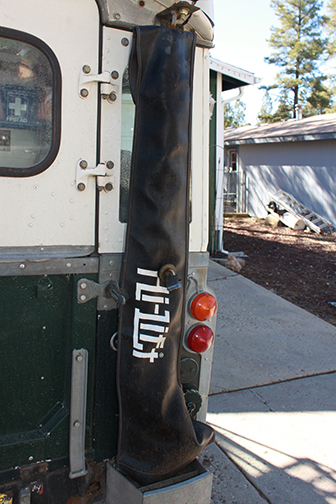
Here is my hi-lift jack mount. The base is sitting in 2
'L' shaped rods inside the rear bumper. I started keeping my Hi-Lift Jack inside a cover because I discovered that with dirt and weather
I needed to clean the jack before each use, The cover keeps it clean and ready for use.

The upper bracket was made from a galvanized steel construction plate from
the hardware store. A large grade 2 bolt mount to the bracket
and goes through a hole in the jack. I filed
the top and bottom of the bolt flat so it would fit
through the jack hole and drilled a hole for a lock. I used a pair of rivnuts and bolts to hold the bracket to the back of the truck.
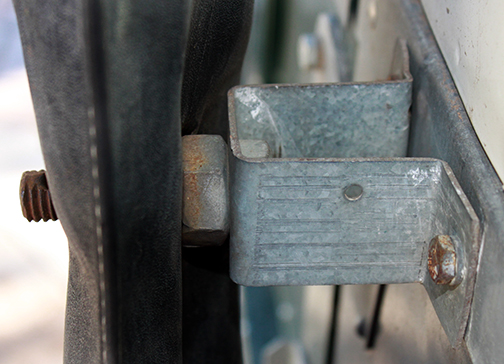
I cut a hole through the Hi-lift jack cover. The bolt goes through a slot in the jack. The big nut on the bolt is against the flat of jack the 'I' beam column making for a solid contact against the jack. Note that these pictures were taken 18 years after I mounted the Hi-Lift jack and everything has held up very well and been trouble free.
A washer and shock bushing holds the jack tight on
the top mount and keeps everything from rattling. trimmed the thickness of the shock bushing down to fit the space between the jack and the lock hole.
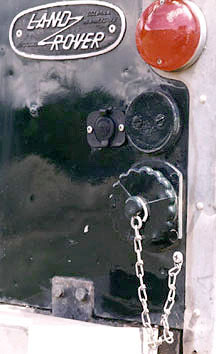 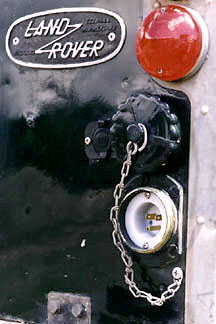
This is a power plug for a military radio trailer. I
looked closely at one on a military Land Rover during a Land
Rover meet and decided that it would be just the think I
was looking for to add a 110V inlet. I bought one during
a business trip to the UK and removed the plug from the housing. I
replaced the original plug with a recessed male mains connector.
It was a perfect fit. This allows me to plug my Land
Rover to a 110V power source using an extension cord. Inside
I have a 11oV connector for my refrigerator, a permanently
mounted 3 stage better charger for the rear battery and a
duplex outlet allowing me to run 110V appliances inside with
the doors and windows closed. You can also see a 12V
outlet at the rear. I use this mostly for my shower
pump.
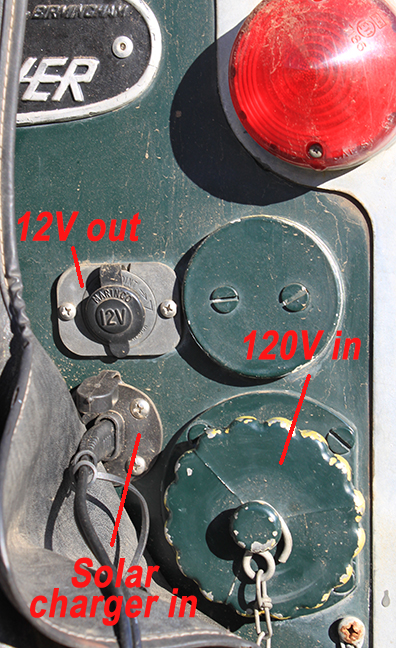
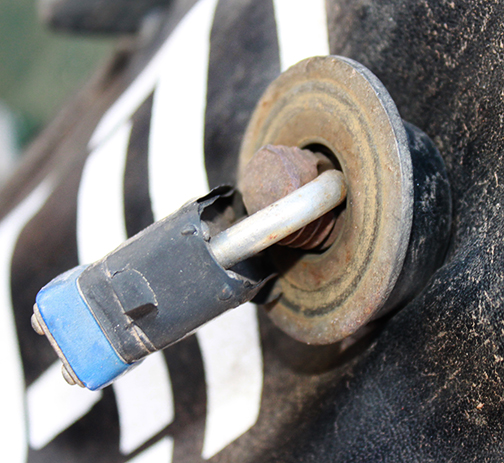
Taken 20 years later than the 2 pictures above. This picture shows the added bulkhead connector for the solar charging circuit. This is a 2 wire system with the wires inside running from the connector to the battery.
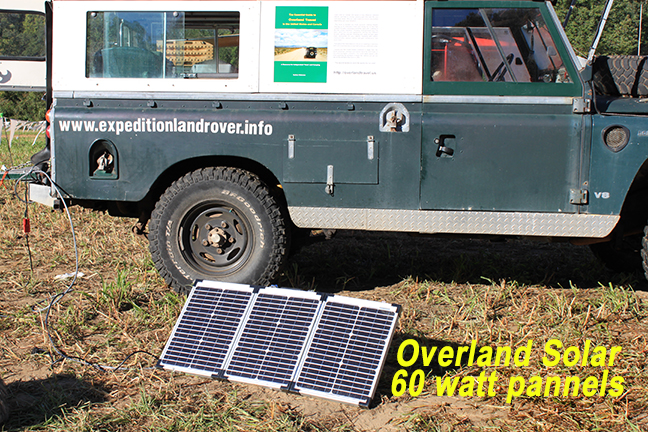
The Overland Solar 60 watt system charging my secondary battery. The 3 panels fold up. There is a controller attached to the back of one of the three panels that controls the power going to the battery. You do not want to use a gel battery for the secondary battery as it takes a significantly longer time to charge and if fully discharged will not recharge properly. My secondary battery provides power for a compressor type chest refrigerator, water pump, 2 LED interior lights, a radio and Smiths clock. On a sunny fall day the 60 watt panel can charge my second battery from less than 10% charge to fully charged while providing needed power for the refrigerator.
Pre Dormobile
pictures | Dormobile
interior pictures |