|

I am writing a book on vehicle
based expedition travel through The United States and Canada
This page contains an early draft excerpt from the section camping
Copyright 2007 - 2009 by TeriAnn Wakeman all rights reserved.
No part of this page can be reproduced without expressed permission of the author

Meals, their preparation, consumption and cleanup can make or break a long trip. Along with a good night’s sleep, the success of an extended overland expedition is dependent upon meals.
When planning for long overland camping trips in North America one of the early considerations needs to be meals along the way. Unless you venture into Northern Canada or remote regions of Alaska you are very seldom more than 50 miles from a grocery store or a gas station that has a selection of convenience foods. This means you do not need to devote a huge amount of storage space for food to last the trip and can rely upon smaller quantities of fresh foods instead of large quantities of processed foods that store for a long time.
Some people do not give much thought to meals and make do with whatever gear is on the shelf at the local sporting goods shop and a supply of freeze dried foods, canned goods or surplus meals ready to eat. The end result may not taste all that good and the food tends to taste the same very quickly. But the meals are very quick to prepare and people can put up with just about anything over a weekend.
.At the other extreme are the folks who have elaborate complicated kitchens that have a moderately long set up time before a meal can be fixed. These are often people who camp as medium to large families and enjoy cooking at home. Setting up an elaborate kitchen can often take more time than eating the meal. When you are tired from a long day, setting up an elaborate kitchen is likely to be way down on the list of things you want to do.
No wonder most casual campers will stop at a restaurant given the slightest opportunity and are ready to go home after a few days in the field. If you are going to stay in the field overlanding on a long trip you need to pay attention to meals and the equipment used to prepare your meals.
Doing anything outside your normal routine will stress your body, including eating different foods than you are used to eating. Our bodies can take a certain amount of stress in stride but become more susceptible to illness and irritation if the stress goes on long enough or if there are a lot of collective stress factors going on in our lives at any one time. This is especially true if you have a medical condition that requires a certain diet or food allergies. One way to reduce stress levels is to eat the kinds of food that you eat at home and rely upon home proven and tested recipes. The trail is no place to rely on untested foods, recipes and cooking equipment. A long duration trip is no place to rely upon food that you would never consider eating at home.
Any solution for food that you come up with should be thoroughly tested at home before going out on the trail. This includes your cooking gear as well. At the end of the day most people prefer to relax and have a nice satisfying meal that fits their tastes and nutritional needs. Eating cold unpalatable food that is scorched on the outside and undercooked in the middle seldom fits anyone’s idea of the perfect way to end a day.
Choices:
Different people have different feelings about the importance of camp cooking. Some prefer to deal with it as quickly and minimalistic as possible and others prefer fine dining in camp. Eating out of cans is always a choice if you are comfortable doing so for weeks at a time. Freeze dried foods are much better than they used to be, present minimum cooking and minimum cleanup. They are often just the thing for someone on a tight schedule who does not wish to spend the time to cook and clean up afterwards or for people who don’t know how to cook. The biggest disadvantages of overlanding on a freeze dried diet is that freeze dried meals tend to be expensive and only available in large population centers or by mail order. So restocking along the trip can be a problem. Freeze dried meals tend to lend themselves best to trips a week or less in duration or for occasional use when you are too tired to cook at the end of a day. They can also come in handy for a quick hot lunch that takes minimal cleanup. On long trips you usually have to make due with whatever is in the local market near wherever you stop for fuel and water.
Your first choice will the kinds of food you plan to eat along the way. Everyone has different food preferences, nutritional needs and preparation preferences that will affect what they bring along and purchase along the way. You need to make your own decisions based upon your own preferences, the kind of overland traveling you do and likely food sources.
You will need to make the major decisions about meals early during your trip planning.
- How many people are you cooking for?
- What special dietary needs do they have and what are their food preferences and dislikes?
- How involved is the meal process expected to be for breakfasts, lunches and dinners?
- How many days you you expect to go between stopping at a place where food can be restocked? Except for Northern Canada and parts of Alaska you are seldom more than 100 trail miles from a place to purchase food supplies and food can be purchased almost everyplace you come in for refueling.
There is an almost infinite variety of combinations and ways to prepare meals. I suggest settling upon 3 or 4 basic types of meals that are adaptable to variations and plan your meals around variations those types. For instance a grilled meat, steamed vegetable and salad meal is almost infinitely adaptable but only requires two burners and one basic grouping of cookware and spices. The a basic stir fry or a pot boiled dinner only requires a single burner and either a pot or wok but can have a large number of variations. This kind of meal preparation planning can save you packing space over having a large variety of meal types.
Once you determine your basic meal types and the number of people you are cooking for you are ready to start choosing cookware that best fit your needs.
Cookware:
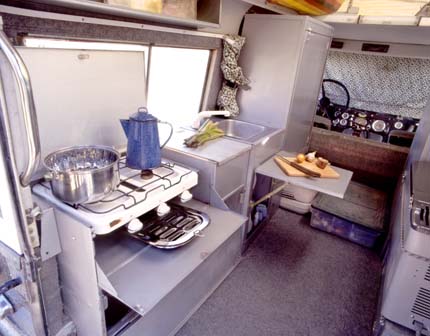
When most people think of cooking gear for camping or vehicle trips they automatically think of special camping cookware sold at outdoor stores. There you will find a mix of back packing cookware and traditional weekend car camping cookware. The common variations of back packing cookware are made of thin sheet aluminum or thin stainless steel. The three most important aspects of back packing gear are weight, compactness and durability. The cooking characteristics of backpacking cookware are not near the top of the list. Most common car camping equipment is just larger and bulkier versions of back packing gear that retain the camp gear look. Since weight is not a critical issue for weekend car camping, cookware is often cast iron and and a blue enameled steel. These are rugged and have a classic gamp gear look that most Americans grew up with.
That’s all OK if you are going to use back packing gear for back packing and regular car camping gear for very occasional weekend use. But these things are not your best choice when you decide to stay on the trail for a week or more.
Your cookware should be optimized for cooking the types of food that you plan to cook and the sizes you will need for the number of people that you are cooking for. Individual items should be sized so that they nestle together when packed to minimize the space they take up. In addition, it should be as close as possible to the type of cookware you have at home. Why? Because you already know how that cookware behaves under heat and have already adjusted your recipes and cooking times to the cookware. They are your best bet for a quick easy transition to successful camp cooking.
Thin sheet metal passes most heat straight through from the burner to the food closest to the heat source and conducts relatively little heat away from the heat source to the rest of the cooking surface. Food will cook unevenly being much hotter directly under the burner than anywhere else in the container. Cooking oils tend to break down in the high heat spot directly over the burner adding a burned flavor to the foods you are cooking. Even with vigorous constant stirring it will be difficult to produce evenly cooked food that is not a boiled meal. Thin metal cookware is good for heating water to pour into freeze dried food packets, heating canned soups or stews with continual stirring but little else.
Water heating in a thin metal pot will come to a boil at a lower temperature than the normal boiling point of water. This is especially true if the thin metal pot is constructed of stainless steel. The bottom surface of the pot adjacent to the heat source will be much hotter than the sides causing localized boiling of the water adjacent to the heat source long before the overall water temperature reaches the boiling point. When boiling food such as pasta in a thin metal pot it is a good idea to allow for 25 to 40% more cooking time that the package label suggests. Using a good sealing lid will reduce the cooking time.
The ideal cookware should have walls thick enough to conduct heat evenly along its surface so that the sides as well as the bottom are at the same approximate temperature. This allows your food to cook evenly. Thick walled cookware will allow you to produce a satisfying meal easier than thin walled cookware can. The metal that you choose makes a big difference as well.
Aluminum cookware: Aluminum is a very good conductor of heat. A thick aluminum fry pan or pot can do a great job of cooking evenly and the high conductivity lets the cookware adjust quickly to changes in heat that you apply. Importantly it is also lightweight. It’s biggest disadvantage is that Aluminum is very susceptible to chemical reactions with acidic foods such as tomato based sauces. This adds its own flavour to your dish. Anti stick coated and anodized aluminum surfaces are inert to acidic foods.
Thick anodized or nonstick coated aluminum cookware is one of the best types that you can use for consistently good cooking results under many conditions. They do require a little additional thought to packing in order to protect the finish but are well worth the effort. Another advantage of using cookware with a high conductivity rating is that it is heat efficient requiring less heat to reach and maintain cooking temperatures. This means you use less fuel to cook a meal and your cooking fuel supply lasts longer .
Stainless steel cookware: Stainless steel despite its popularity in high end back packing cookware is actually a poor conductor of heat. Its heat conductivity is less than 10% of that of aluminum cookware. At the same wall thickness, stainless steel is about ten times more likely to burn the food next to the heat source and undercook the food adjacent to the sides of the pot than is an aluminum pot. The advantage is that it is rugged and chemically inert to foods. Salt can pit stainless and high temperatures permanently discolors it. Its chief advantage is that it is durable.
Cast iron cookware: Cast iron cookware has around 20% of the heat conductivity of aluminum cookware and is thick walled cookware. It heats slowly and once it reaches a cooking temperature it maintains that temperature better than any other common type of cookware. This allows for even temperature cooking even under the most difficult of conditions. Cast iron, like uncoated aluminum, is susceptible to chemical reaction with acidic based foods and can impart its own flavor to acidic foods. They may not be the best choice for tomato sauce based meals.
Cast iron’s ability to provide even heating and to retain an even heat makes it a very good choice for many kinds of cooking as long as you can handle the weight penalty and cast iron’s tendency to rust if not kept dry and seasoned. If you can afford the weight and can store cast iron dry, a large cast iron griddle can be a very useful item to have along, If you are cooking mostly by campfire, cast iron usually is your best bet and a good dutch oven is the perfect pot to have. This should be the type that has legs on the underside and a flat top with a rim. Just be aware that if you pack much cast iron you will likely need to shave weight elsewhere to keep your vehicle gross weight down.
Over the years I have tried many types of camp cookware and have settled upon anodized thick aluminum cookware for stove top cooking and cast iron for camp fire cooking. I’ve kept a single large stainless steel pot because it is light weight and a perfect fit for the common stainless steel vegetable steamer. It also does double duty as a camp site water pail and protected storage for a bag of pancake mix and wine glasses.
Lids: Lids serve two primary roles in camp cooking. They keep heat inside and they keep foreign objects out of the food. A heavier well sealing lid can allow a slight pressure build up inside a pot allowing food to cook faster at high altitudes. Most camp stoves are hard to adjust for low heat output so cooking usually requires close supervision. Lids are seldom useful during cooking unless you are boiling, steaming or poaching something.
After a food is cooked lids help retain the heat in food removed from the stove before it is served. They also serve as a barrier to keep flying insects out of the food. In both cases a plate will work just as well or better.
Except for use on a steamer or for a dish where hot air is required at the top of a pot, such as for poaching, browning dumplings or a dough crust, lids have little actual use on the trail that can not be duplicated with a plate. Lids in general add bulk and weight to the camp gear for little actual gain. I suggest a lid for any pot you steam with or a dutch oven but try to resist additional lids. Your gear has got to fit in the space you have.
Heating water: You would be hard pressed to find something that heats water as well as the standard blue enameled steel camp coffee pot. The narrow vertical design is a very efficient way to heat water. I consider mine to be an essential part of my camp gear. When looking for a pot to heat water, stable tall narrow diameter pot will heat water on a camp stove faster, using less energy, than a shorter wide diameter container.
Dishes:
There are two primary schools of thought about dishes. One school places value on reusability the other upon fast convenience The reusability school tends to be those who try to minimize the volume of trash they amass on the trail. This group tends buy rugged dishes that serve and last well. The convenience group tends to want to trade trash volume for the speed of camp cleanup and for using less water. As a group these people tend to focus more on the trail and less on camp logistics.
When most people think of camping dishes, aluminum or blue enameled steel dishes immediately come to mind. Metals conduct heat readily. This means your metal plate or bowl will likely be too hot to touch when you dish up the food and will have drawn the heat away your food long before you have completed your meal. Probably the best dishes you can get for camping are made from high impact resistant plastic. Plastic is light weight, durable and most importantly it does not conduct heat well, Your food will stay at the desired temperature much longer than if you use a standard metal camping equipment dish.
Restaurant supply houses are good places to look for high quality impact resistant plastic dishes. Larger oriental markets often have a cookware row that includes a selection of plastic dishes. You can get them as simple or as decorative as your tastes prefer. How much cookware you get depends upon several factors, including how many people you travel with. To conserve time and water I tend to only wash dishes once a day. So two of every dish per person works out best for me as long as I have the storage space. Their weight is so light it does not become a factor. I prefer to have a regular meal size plate, a sandwich size plate, cereal size bowl and a shallow wide bowl for salads or pasta. They all nestle in together when packed and do not take up much space. As you add more people to the party, you might wish to cut down on the number of dishes and wash them more frequently.
Flatware and Utensils:
Eating utensils sold in camping stores tend to be lightweight, easily bent and are often made so they can be fastened together. The ideal eating utensils for vehicle camping are heavy duty and not easily bent. Regular household flatware is a good choice here. Look for flatware that feels substantial and appears to be thicker than the cheap stuff. You want the kind that will hold up under abuse.
For cooking utensils such as cooking spoons, spatulas and such I strongly prefer the black nylon verity. They are light weight, almost indestructible under normal use, can bend without breaking and are safe for non scratch or anodized cookware. I also recommend a pair of stainless steel (low conductivity remember) tongs for lifting and turning meat without puncturing it and letting the juices flow out. Can, bottle, and wine openers round out my utensils. I store my flatware inside a small plastic container with a tight fitting lid to keep trail dust out.
Knives:
You will need at least one good sharp food cutting knife for food preparation and a way to safely store it so the blade does not become dull.
Other items:
A cutting board of some kind is essential if you wish to keep your cutting knives sharp. Cutting on a plate or pan will dull a knife and may harm the surface that you are cutting on. It is usually a good idea not to cut food stuffs in your hand if you do not wish to flavour it with your blood. Plastic cutting boards are the easiest to sanitize and maintain. I personally prefer a wood cutting board even though it is higher maintenance. When choosing a reusable cutting board I suggest that you bring a gallon size resealable plastic bag with you. Pick a cutting board size that fits inside the bag. Storing your board inside the bag will keep it clean between uses. If you use a wood cutting board it also protects the board from drying out and splitting in hot arid climates.
Roll up disposable plastic cutting surfaces are now available. These are light weight, easily stored and disposable. To make the best use of them you will need to always have adequate food preparation table space. A rigid cutting board is easier to juggle around when it has cut food on it and when food preparation space is minimal. The down side is that you might run out of cutting board sheets before you run out of trip and replacements are not common in country convenience stores.
Extra plastic food containers. These come in useful for storing leftovers and pre made meals for the lunch stop. A sandwich sized container is a perfect size for dipping bread when making french toast.. If you use canned food you can store any unused portion in a sealable container. They are great for your cooler as well, providing a barrier between the contents and the interior of your food cooler.
Optional but useful implements:
Spoon rest: This may seem silly at first thought but a plastic spoon rest designed to handle multiple utensils can be very useful when camp cooking. Clean surfaces to rest a cooking implement upon can be hard to come by when camping. A clean spoon rest will give you a designated place to keep the cooking utensils while in use. Weight and bulk are minimal.
Food strainer: A food strainer is almost indispensable to drain the hot water out of boiled foods such as potatoes and pasta. They are lighter weight than pot lids, easier to use for draining and can be chosen to nestle into your pot stack so it takes up minimal space. Since I tend to cook a pasta based meal at least twice a week on the trail I would not travel without one.
Grater/ shredder: I like to grate aged romano cheese on some dishes and a flat stainless steel grater handles the job. It is also handy for grating carrots for salad and making hash brown potatoes. Space and weight are minimal.
Wok: A wok is great for preparing quick one pot meals. It is versatile and lends itself to cooking many types of dishes. It is especially handy if you have a number of different food items left in quantities too small to prepare as regular helpings. The down side of a wok is that it takes up a lot of space. Personally I tend to bring a wok on short trips of under 7 days and leave it at home to save space on longer trips. If I had a little more space for storage, the wok would always come along.
Washing dishes
It has occurred to me that some people may use paper plates simply because they were raised with dish washers and really do not know about washing dishes without lots of running water. My grandparents lived in a house with hand pump water when my mom learned to do dishes. I learned about doing dishes from them. I'll share what I learned.
Basically you need two dish washing tubs and a drying rack of some kind. There are rectangular plastic dish washing tubs that can be nested together for storage and filled with your plates, pots & such while traveling. They could provide you with a lidless box for organizing some of your kitchen stuff. Alternatively lidded plastic storage containers can serve as storage and as wash tubs. The dish washing tubs are also handy for such things as laundry and soaking tired feet.
One tub is used for washing the dishes and the other is used for rinsing them. The way I was taught was to go from the cleanest dishes to the dirties dishes saving the stuff with grease & cooking oils to last. Glasses go first, then utensils, plates then bowls. The pans go last unless they are relatively clean and oil/grease free. Pots used to cook pasta or to steam vegetables would be washed early.
I have a plastic folding dish rack that I picked up from a RV accessory dealer. Folded up it is about the size of a one inch thick binder.
Cooking oils:
Cooking oils keep foods from sticking to a pan and imparts their flavour to the food that you are cooking. When an oil gets hot enough to reach it smoke point it begins to break down and smoke. The breakdown causes the oil to have a disagreeable burnt flavor which will permeate what you are cooking.
Most camp stoves have burner knobs that are difficult to adjust for low flame levels so are often run at full heat or close to it. While a full flame is great for boiling water quickly it is a recipe for food that tastes of burnt cooking oil. Animal fats reach their smoke point at around 360 degrees and start affecting the flavour of the meat being cooked. Red meats should be quickly seared on each side at about 400 degrees to seal in the juices then cooked below 350 degrees. Common cooking oils have smoke points from about 400 degrees (olive oil) to about 440 degrees (sunflower oil). Exceed those temperatures anywhere on the pot’s cooking surface and your food will taste like burnt oil. Butter which has a smoke point of about 250 degrees should not be used as an oil for field cooking unless you have developed good control over low burner settings.
Thin metal cookware will have a hot spot right under the burner that can easily exceed the smoke point of most oils. That is one of the reasons it is so hard to cook a really tasty meal with traditional thin metal back packing style camp ware.
While edible oils and fats are biodegradable most are digestible by only a few species of bacteria and can sit around gumming up a camp site for several years. Try not to dispose of used cooking oil in your camp site. Excess cooking oil or fats can be soaked up in paper towels and placed in the trash bag. Fat soaked paper towels usually burn well if you have a hot camp fire.
Stored cooking oils turn rancid over time. It is not a good idea to store cooking oil in your camping bottles between trips. Use the remaining oil up at home after your trip, clean the bottle and use fresh oil when packing for your next trip.
Sometimes small country stores may keep out of date oils on the shelf, especially stores that cater mainly to tourists and are open only seasonally. If you need to restock your oil in such a store be sure to check the expiration date on the bottle before heading for the check out counter.
Spray on anti stick oils can help keep food from sticking and make the cleanup chore much easier. It even works on BBQ grills.
Food sources
In North America there is almost always groceries available for sale at or near any place you stop to take on fuel and water. This will influence the quantity of food you need to carry and can influence the types of food you eat. In rural areas or in seasonal stores selections may be minimal with an emphasis on canned or packaged meals. If you are planning on minimizing on board food bulk by buying food as you go it is generally a good idea to bring along a good store of spices, sauces, coffees, teas and other things that you would not expect to find in a gas station convenience store or a small rural market.
In many of the more arid parts of the United states small town grocery stores tend to have an excellent selection of high quality fresh meats but a poor and often wilted selection of fresh vegetables. The less arid farming regions tend to have much better selections of fresh vegetables. Small towns that see large numbers of camping tourists year around, such as Moab, Utah tend to have at least one large food store that stocks a wide selection of fresh foods.
Seasonal and campground stores tend to be big in packaged noodle based and canned foods but tend not to have fresh foods. There is often a small selection of frozen meats available. Near the close of the store’s open season they let the stock run down. Don’t expect much from these stores at end season. It is a good idea to check expiration dates on packaged goods. Fresh white bread and sandwich makings are almost universally available.
Trash
I've seen many people who use paper plates try to burn their plates and garbage afterwards. This only seems to work with a largish hot fire. All too many times I've come across fire rings with partially burned paper plates, cans and bottles inside them. Please pack your non burnable's out as well a anything you can not burn completely. Don't bury it for animals to dig up later, don't partially incinerate it. It is always a very good idea to leave a site as clean or cleaner when you leave than it was when you arrived.
Keeping it clean and under control:
Many people do an absolute minimum of cleaning and organizing while on the trail. While you can easily get away with that for a weekend trip, this style becomes unworkable when you are out on the trail for several weeks. The longer you are out in the field, the more important a clean place to eat and sleep become. On long trips it is critical to have an ongoing routine that maintains your environment to a level that you find acceptable. You can put up with just about anything for a weekend. I have discovered that if you keep up a daily cleaning routine the chore is a lot easier and quicker to do than if you let it build up.
I keep my cookware and packaged foods inside plastic boxes. The boxes were specifically chosen to fit into the spaces and crannies that my Land Rover has. Unless the box makes a water tight seal, dust can get in. I use gallon and quart zip lock bags to store as much as possible. Between the plastic box and the sealed plastic bags, my cookware stays clean through the worst of dusty trails and is ready to go when I am. I place a layer of thin flexible foam between surfaces of nested pans to protect their surfaces from damage caused by vibration. Each pan is also kept inside a plastic bag to help keep them clean and ready for use. This also helps keep noises down while off road.
Canned and bottled foods are stuck into crannies and I just clean the outside off when am ready to open them.
I have a refrigerator for keeping foods cold. Water condenses inside of refrigerators unless you are traveling in arid climates. I usually empty my refrigerator and wipe it clean every three or four days. This is usually not an issue during desert travel. Meat is stored as individual servings, each in their own plastic zip lock bag to keep germs from spreading and to keep meat juices from leaking throughout the refrigerator. I prefer to purchase milk and orange juice in plastic containers. I have found that the paper containers leak more often then not after a lot of bouncing. My eggs sit in a hard plastic container. My butter, film, any chocolate and other items that may be affected by moisture get their own zip lock bags.
If you are using an ice chest sealing foods in zip lock bags becomes even more important to prevent spoilage. You should also drain water from an ice chest at least once a day.
I have found that meat will last longer if it is frozen when you put it into cold storage.
Methods of cooking
Stoves
Grilling
Grilling is the intermediate step between stove cooking and open fire cooking.
Gas grills
Charcoal
Charcoal is a product of incomplete combustion made by burning wood at a high temperature in an enclosed container that is as close to air tight as possible. This drives out the moisture and burns off the resins. The result is a compact, light weight product that produces high heat, next to no smoke and imparts relatively mild unique flavour to foods.
There are two general types of charcoal, traditional charcoal and charcoal briquettes Traditional charcoal is made from pieces of wood and nothing else. The charcoal flavour, while milder than burning wood has the flavour of the wood the charcoal was made from. One can choose from different hardwood charcoals to compliment the flavour of the meat you are cooking.
Modern charcoal briquettes were developed by Henry Ford as a way to utilize waste products from the manufacture of model T Fords. The wood source is often sawdust. Sawdust charcoal is powdered and usually mixed with coal dust and a binder in a liquid slurry then pressed through a die or mold to get its shape and then dried. Charcoal briquettes tend to have very little flavour. Sometimes small chips of a hard wood are mixed into the slurry in an effort to produce a more natural wood flavour. Instant light charcoal have volatile hydrocarbons added that burn easily. These additives tend to produce a hydrocarbon taste if they are not completely burned off before the meat is added to the grill. It is best to keep the grill away from charcoal briquettes until they have burned off their hydro carbon components,
Campfire cooking
Campfire cooking is about as old school traditional as you can get and still eat cooked food. Cooking directly on a camp fire brings you closer to the lives of early travelers and nomads but requires a special set of skills, the results are variable and it takes a while. When humans settled into one place they built stoves and ovens to help better control how things cook, add verity to how they cook things and to better separate the food from the sources of heat. Not everyone loved the flavour of a steak flavoured by buffalo chip smoke. But if you are not in a hurry, camp fire cooking over a bed of coals lends its self quite well to dutch oven and tinfoil wrapped cooking.
If you are are grilling or cooking in an open pot over a fire you need to pay particular attention to the types of wood you cook with. All wood are not created equal and they are an important seasoning component in open cooking over a camp fire. Each type of wood imparts its own unique flavour to food that is exposed to its smoke. You can enhance the flavour of your food or you can make food almost inedible by your choice of fire wood.
Soft woods such as pine and spruce have a high resin content that produces a thick black smoke that coats cooking food with an overwhelmingly strong tar like taste. You want to stay away from these woods if you are cooking over a camp fire.
Hardwoods as a class burn hotter and cleaner with way less soot. If you have a choice of hardwoods, you get your best results by matching the wood type to the kind of meat you are cooking.
Oak burns hot, produces a lot of smoke flavour with no aftertaste. It is your best all around cooking wood.
Mesquite burns hot and produces a distinctive spicy smoke flavouring that overwhelms delicate flavoured meats such as fish or poultry. Mesquite does stand up well to beef, game and most stronger flavoured game birds.
Hickory smoke adds a strong bacon like flavour that works well with beef, pork, lamb, poultry and game.
Alder produces low heat and a smoke with a sweet delicate flavour that works very well with fish and poultry. This is an excellent choice for fresh salmon or trout.
Maple is a smoky wood that produces a mild slightly sweet flavour that works well with pork and poultry
Putting it all together
Once again I can not overemphasize the value of trying out your basic trail foods at home using the same stove and cookware that you will be using on the trail. You will learn a lot by doing this that will make your trips a lot more pleasant. This is the time when you can experiment with different cookware & utensils to see what works best for you
As you practice, make lists of things you use such as utensils, pot holder, spoon rest and food ingredients. This list can become the basis for your trip packing list. If some of the cookware doesn't meet your needs well replace it with something that better fits your needs.
Eat what you like and know how to cook. Use the cookware that you know how to use. Keep your cooking surfaces and cookware clean. You will stay healthier and traveling will be more pleasant.
----------------------------
Food:
Packing the basics
When packing for a trip I make sure that I have the basics I need for all my standard meals. Small country stores often will carry a minimum of items and have very little variety. I make sure that I have an adequate supply of items I use in my cooking that may not be available in a small store.
By having a group of basic recipes for trail cooking I can easily assemble a shopping and packing list. This list can be very important. Preparing a meal that you have set your appetite for is the wrong time to discover that you forgot to pack a critical ingredient.
My trip staples include: Sun dried tomatoes, garlic cloves, fresh mushrooms, extra virgin olive oil, a spray on nonstick cooking oil, rice vinegar, malt vinegar, BBQ sauce, lite soy sauce, maple syrup, mustard, lite miracle whip, jar of applesauce, cinnamon, ginger, pancake mix, eggs, milk, butter, orange juice, a selection of canned soups, canned tuna, canned peaches, a prepackaged salad mix, a low fat polish sausage, bread and rolls. I make sure that all these items are packed anytime I leave for a trip longer than a weekend.
In addition to these staples of my kitchen, I carry a variety of vegetables, fruits, fish and meats.
I have provided a list of my standard meals as an example to help you start your own standard meals list.
Breakfast
I like tea in the morning. So I have a pot of water ready to go before I go to bed the night before. That way if my water freezes during the night, the tea water is ready to heat. I use the best quality tea I can find and don't reuse tea bags on the trip. I pack sugar cubes because it is a quick easy way to measure a consistent amount of sugar.
I have seen coffee drinkers create fancy elaborate coffee drinks first thing in the morning. If you are used to morning caffeine, take the time to make the best quality pot that you can. This can do wonders to start your day on a good note. Just remember that coffee and tea are both diuretics. You will want to drink them in moderation if you are going to be away from a rest room or in an area where dehydration is a significant safety hazard.
When deciding what to have for breakfast use your own personal eating habits as a guide line. If you are used to a light breakfast, have a light breakfast and keep a snack handy for the time that you normally get hungry.
When I am in a hurry, I will generally have ether a bowl of cereal, or a container of low fat yogurt and a roll or two. These are quick, require little preparation and little cleanup. I normally carry fruit to add to my cereal to make it more interesting. Canned peaches is a favorite.
When I have time to cook in the morning I have three basic meals that I usually cook on the trail: pancakes, French toast, and an egg scramble.
The pancakes are made from a package mix where all you add is water. I vary this by adding fresh banana, berries or nuts.
The French toast takes an egg, a little milk and for me a lot of cinnamon. I find French toast to be very quick and easy to make. I prepare it in a plastic container designed to store a sandwich. It is shallow, doesn't take up much storage space and fits a slice of bread. It can also be used as a container for marinating meat.
My egg scramble is my most complicated breakfast dish. I sauté fresh garlic, sun dried tomatoes, green onions, and slices of lean polish sausage then add an egg and cheese.
This gives me five basic morning meals that I carry ingredients for and can fix according to my schedule and mood.
Lunch
Once again, use your normal lunch habits as your primary guideline. Of course this will be modified by the length of time you have for lunch and how much effort it requires to prepare and clean up after a meal.
I prefer to have hot lunches. Luckily, I travel with my stove already set up and ready to turn on so I can quickly cook a meal. If I do not have time to cook, I have food along that is quick to make and doesn't require cooking. Pre made sandwiches get soggy or stale. But sandwiches can be made quickly if the ingredients are ready to go.
For lunch I like a combination of two of the following: soup, sandwich and salad. I keep a supply of my favorite canned or packaged soups on hand, sandwich making supplies and pre made packaged salad greens. This provides me with a quick satisfying lunch in a short time.
I think if I had to unpack and set up a stove, I would tend to go for cold lunches if I were on the trail.
Lunch is the meal I am most likely to stop at a restaurant for if I'm in transit on paved roads.
Dinner
Usually by the time I stop for dinner, I am tired and hungry. Before I start fixing a meal, I will fix a quick salad and have a roll. This takes the edge off my hunger and improves my spirits while I prepare the rest of my meal.
I have three basic dinners that fit my cooking facilities that I tend to cook while on the trail. The quickest and simplest is to broil a meat and steam a vegetable to go with the salad and bread I have already consumed.
Another common alternative for me is a pasta dish that requires one burner to cook pasta and one burner to cook the sauce or sauté vegetables, garlic, sun dried tomato and a meat. If the pasta dish is meatless I tend to broil a meat to go with it.
My third common trail dish is a stir fry. I put a little of just about everything I have in it.
Each of these three basic meal types are simple, quick and easily varied with different kinds of vegetables, sauces and meats. Most importantly I know how to cook them and find them to be satisfying.
My Dormobile cooker is 2 burner plus broiler. I use the broiler a lot and it opens my meals up to three cooked courses. I wouldn't like to go on a long trip without one.
One dinner I like to prepare weekly is a chicken and pasta dish
Ingredients:
- extra virgin olive oil
- about 5 or 6 garlic cloves, coarse chopped
- 4 fresh rosemary branch tips (each about 3 or 4 inches long)
- 1 large shallot or 2 medium, course chopped
- Some mini penne or just penne pasta
- 1 half chicken breast, cut into bight sized pieces
- 4 or 5 julian sliced pieces of dried tomato, course chopped
- medium portabello mushroom chopped to bite size pieces
- Whatever white wine you wish to have with dinner
(I like a dry Riesling with this meal)
- fresh wide leaf parsley medium fine chop
- aged Romano cheese
Serves 2
Everything except the pasta is cooked under a low heat relying upon sweating the ingredients together and not the higher heat of saute. If you can not adjust your stove to a very low heat, don't bother with this dish. I use a thick wall anodized aluminum pan to cook this meal.
Add the olive oil, rosemary and mushroom and let it simmer go get the rosemary flavour into the oil. When the mushrooms start to change colour from the cooking, add the shallot(s). When the edges of the shallots start to turn translucent add the garlic and chicken. When the chicken is just browned add the dried tomato and enough wine to deglaze the pan.
There needs to be enough olive oil and wine to coat the pasta. If there is not quite enough, add more olive oil. Remove the rosemary branches.
When the chicken, shallots & garlic appear to be cooked, add the flat leaf parsley, stir in then add the cooked penne pasta. Toss or stir to coat the pasta.
Dish out then grate some aged Romano over the top.
Return to page top |