|

About The rear interior of
my 1960 through 2002 Land Rover Dormobile
owned since March 1978
Take me direly to the interior pictures
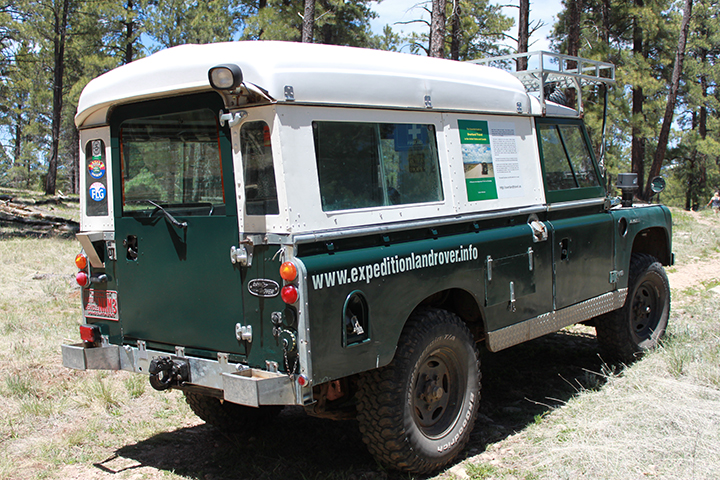
3/4 view taken in 2016 soon after my new 2002 rear door was mounted.
I washed and waxed the truck to try and match the fresh paint on the new door.
If you are wondering, the colour is British racing Green.
An Introduction:
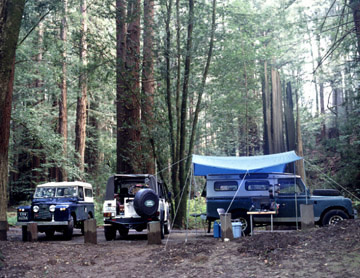
My Land Rover started out as a 109 regular with a pickup top. After I had the truck for a couple years I saw the advantage of a full length hard top during rainy weather when carrying hay or livestock. I traded my pickup top for a full length tropical top around 1981. For slightly over a decade I traveled and camped in my Land Rover, sleeping inside and with my kitchen and day camp outside the truck. Which was fine during warmish dry weather and maybe not so fine in the cold wind, rain or snow. This of course shaped my view of travel and camping weather. If rain threatened I would erect a tarp shelter over the truck and my kitchen area using the truck to anchor one side of the trap.
My kitchen was always on the truck's right side to make use of the
built-in propane tank.
One year I found myself in western Oregon trying to set up camp at night during a near gale force rain storm. I set out a Coleman propane lantern to see by as I erected the tarp using my poles and tying to nearby trees. A gust of wind ripped a line from my hands causing the tarp to flap loose knocking over the lantern, breaking the glass globe and catching the tarp on fire. I extinguished the lantern as the driving rain quickly extinguished the fire. Soaked, I retreated into the rear interior of the truck for the night. By flashlight I tried to make some sort of meal out of things I didn't need to cook. My hair kept getting caught on the roof vent latches. As I sat there I decided to move my camp inside the truck safe from bad weather. From that time on I started researching different options.
My Goal:
My goal was to be able to camp completely inside my truck, including storage, food preparation and sleeping. I wanted a layout that would allow me to camp comfortably for weeks at a time, only coming in about once a week for fuel and groceries.
My Strategy:
Since I'm not concerned about originality, my strategy is simple, look at as many small room camper solutions as practical to learn how they laid out the insides to best handle day to day camping chores and to try and integrate the best task solutions to fit inside of a 4 foot by 6 foot Land Rover rear interior. And to maintain space for my Irish Wolfhound. Dog space and sleeping space took up the lion's share of the interior leaving almost nothing for storage and cooking. looking at different camping solutions I soon decided that I needed to be able to lift the roof and move the bed above everything else.
Research:
I went to RV, trailer, and camper stores to research how they arranged their interiors. I soon focused on small pickup campers as they were closer to my truck's interior size. I also examen the interior of every Land Rover camping conversion I could find to see how they were set up and asked their owners what worked best and what they might consider doing over. I looked into front hinging my hard top and using hand pump hydraulic rams to lift the rear. Canvas handling and board movement seemed awkward but a doable solution. I really liked the Carawagon and Dormobile layouts. Each had features that were better than the other. The Carawagon roof only allowed me to fully stand up along the centre. I really liked the openness that the popped up Dormobile roof provided and its top bunks that stowed out of the way. But I didn't want to sell my truck and buy a Dormobile or Carawagon. At a British car meet I learned about a Dormobile kit that had been salvaged from a Dormobile that was wrecked in Alaska. The fiberglass lifting roof was ripped in a couple place and, the aluminum roof had a shallow V bend on one side. The kit had been sitting outside in the weather, including winter snow for a few years. The steel bows that held the canvas top out were rusted to dust in the middle sections, the roof vent was broken and the interior furniture had a lot of surface rust. But the kit was complete including badges and the kit's commission number plate. A number of people passed it up deciding that it was going to be too much work and expense to fix. This was the best solution I had found in a couple years of searching. So I bought the kit, loaded it in and on my land Rover and took it home to repair.
New tyres and wheels and a damaged Dormobile roof strapped to my truck's
roof. Ready to start the conversion which would include badly needed paint.
After the kit came home, the roof went to a Corvette body work specialist to have the tares in the fiberglass repaired and the shallow 'V' shaped bend in the aluminum roof and gutter straightened. The badly rusted steel bows went to a custom metal fabrication shop to be used as a model for fabricating new bows made from stainless steel, and I took the furniture down to bare metal and refinished them silver hammerite, per the factory finish. I found a shop to repaint the truck and decided to have it done in parts. I removed the front wings, bonnet and doors to have them painted off the vehicle. Then I removed the hard top, rear lights, seats and all the interior bits and had the rest of the truck painted.
While everything was apart I made my first decision about the interior layout. Dormobile kits mounted by the factory using a wardrobe (tall cabinet) all ended up blocking a window. A wardrobe with its lift up seat mounted opposite the cooker unit placed someone sitting on the seat too close to the cooker to be usable. I decided that I wanted a fold down land Rover jump seat to be opposite the cooker so there would be space for legs when sitting and cooking.. The Dormobile kitchen unit was designed to be place in the left rear corner, which meant the jump seat would be in the right rear corner. I wanted opening windows to be on both sides at the rear and no windows behind the wardrobe. The only factory opening windows are on sides used on 109 station wagons and 88s which wee too short to work on a 2 door 109. After some looking and thinking I decided to create what I wanted using a pair of 88 windowless sides and a pair of sides that had sliding open windows. I cut the back off the blank sides, the front off the window sides and joined them together to get exactly what I wanted. When the roof was repaired it went onto my freshly fabricated roof sides which were on my freshly painted truck.
Next was furniture placement. The location for the Dormobile kitchen unit and the spice rack, both of which were built to fit in the left rear corner was a given. And I wanted a single folding jump seat opposite the kitchen unit. I had yet to decide where to place the wardrobe and my dual voltage chest refrigerator. There was not enough space to fit both the wardrobe and refrigerator on the left side but if I removed the refrigerator handles there was just enough on the right side. I was giving strong through to mounting the refrigerator unit on the left side next to the kitchen unit and the wardrobe on the right side front corner. But what to do with all the left over space on both sides. One thing I noticed early on when looking at Dormobiles is that they don't have enough storage space. The back floor was always loaded with gear that had to be removed whenever camp was set up. I decided to construct a second wardrobe to put on the driver side posit the factory wardrobe, doubling the cabinet storage space. Factory wardrobes came with either a flip up jump seat or a cutout to fit a portable toilet. Since some government lands require that you pack out your waste I decided to cut the bottom to fit a small pota pottie. I also decided to make the door full width and hinge it on the left side so it would open blocking the view from the front window. I purchased a sheet metal brake (later sold for what I paid for it) and constructed a wardrobe out of sheet aluminum. While I was at it I built a platform to hold the refrigerator which was wider than the side bench. I added a front bottom hinged door so I could take advantage of the space under the platform where it overhung the truck's side bench.
All this left me with a small space on the left side under the side window. I pondered a use for it for a while and finally decided to make a short cabinet with a second sink. The Dormobile sink is too narrow to hold a plate and a common stainless steel camper sing would fit and hold dishes flat. I built the second sink cabinet and decided to top hinge the cabinet door so it could be used as additional counter space. It is awkward getting to stuff with the top hinged door so I decided to use it for items needed less often. With this the interior was basically laid out and built. I sold the sheet metal brake and proceeded to add odd and ends as seemed to be needed as I gained experience camping in my new interior.
Rear Interior pictures
Return to page top
|